Notes To Drafter
Tired of keeping track of internal notes in your project? Are you on a deadline and you need to print a whole set without any internal notes showing? This plugin might be the right one for you. Note To Drafter allows you to manage internal notes inside your Revit project.

Start by downloading from the App Store
Navigate to The Toolbelt tab in Revit
Once successfully installed, a Toolbelt tab will be added to your Revit ribbon. Under the Toolbelt tab you will find the Notes To Drafter panel with two buttons; Notes Manager and the Place Note buttons.

Loading the required Revit family
In order for this plugin to work, you need to have the “Toolbelt_Note_To_Drafter” Annotation Symbol family loaded into your Revit project. The first time you click on either one of the plugin’s buttons, it will automatically load that required family in the background. However, if it fails it will give you the option to load it manually.

Place your note instance
To place a new note instance, navigate to the Toolbelt tab and click on the Place Note button. The Place Note dialog offers an easy and fast way to place multiple notes and fill in their parameters.
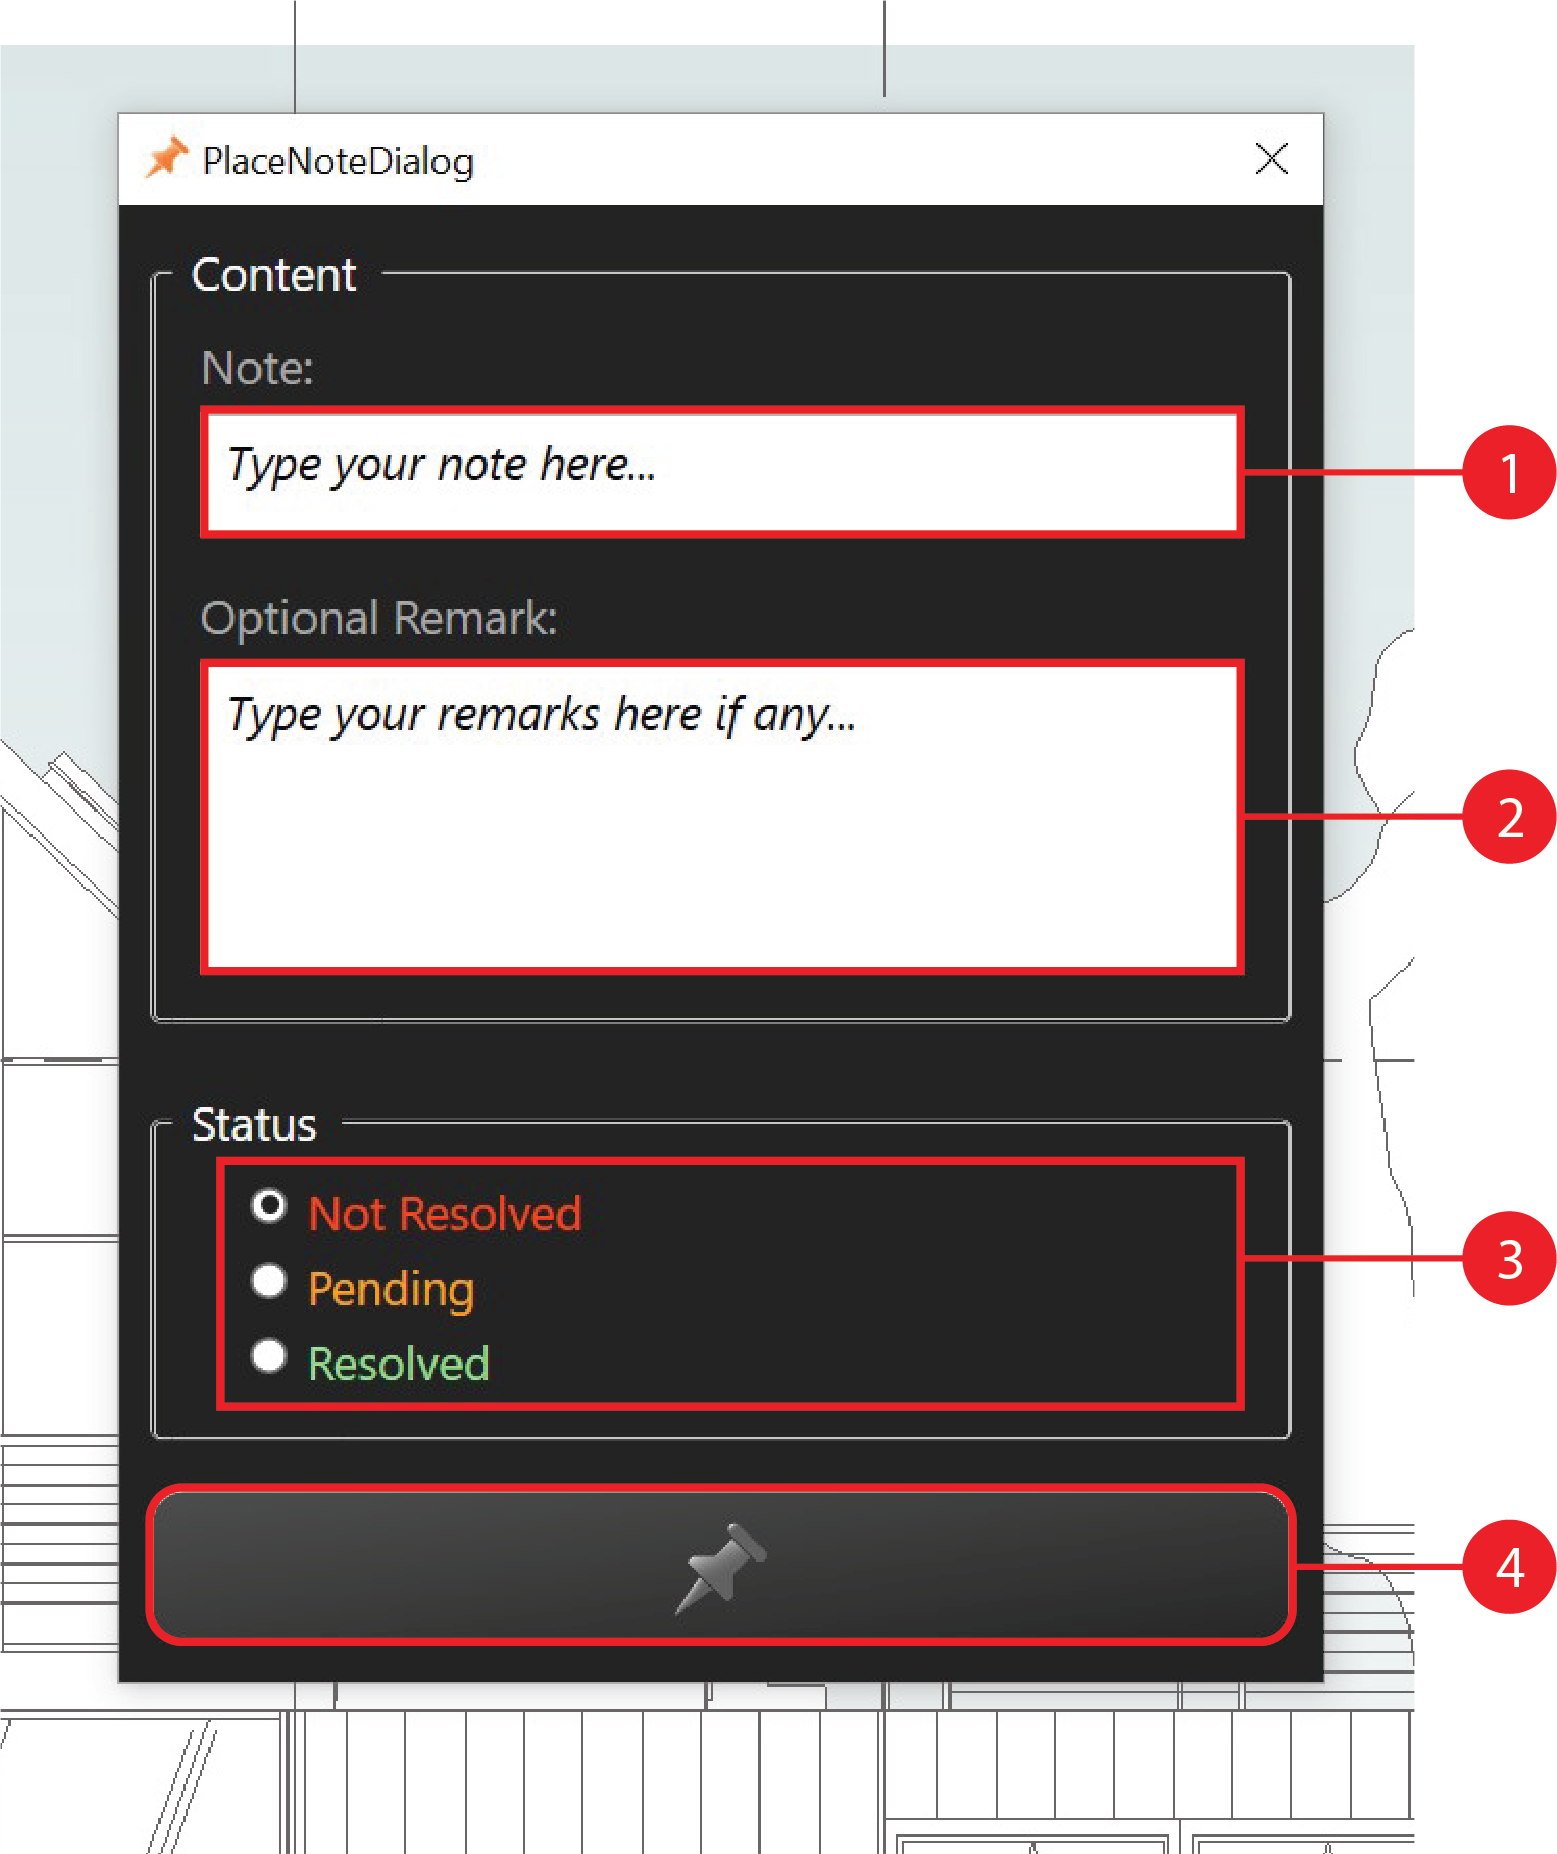
The main content of the one that will be displayed in the Revit view.
Optional additional content expanding on the main note.
The current progress status of that note instance.
Once ready, Prompt to place the note instance in your Revit view!
Manage your Notes
The Notes Manager offers a set of features that makes it easy to keep track of all Note To Drafter instances in your Revit project. Some of theses features include exporting notes for sharing, modifying visibility settings, and highlighting notes in the Revit model.

Hide/unhide all current note instances that have the corresponding status assigned to them.
The current count of all notes that have the corresponding status assigned to them.
Delete all note instances in your project.
Export all note instances currently visible in your the Notes Schedule.
Highlight the currently selected row in the Revit model.
The Notes Schedule will display information for all notes that are set to visible in their corresponding Revit views.
The Refresh Notes button will update the color of notes in your project based on their latest status assignment.
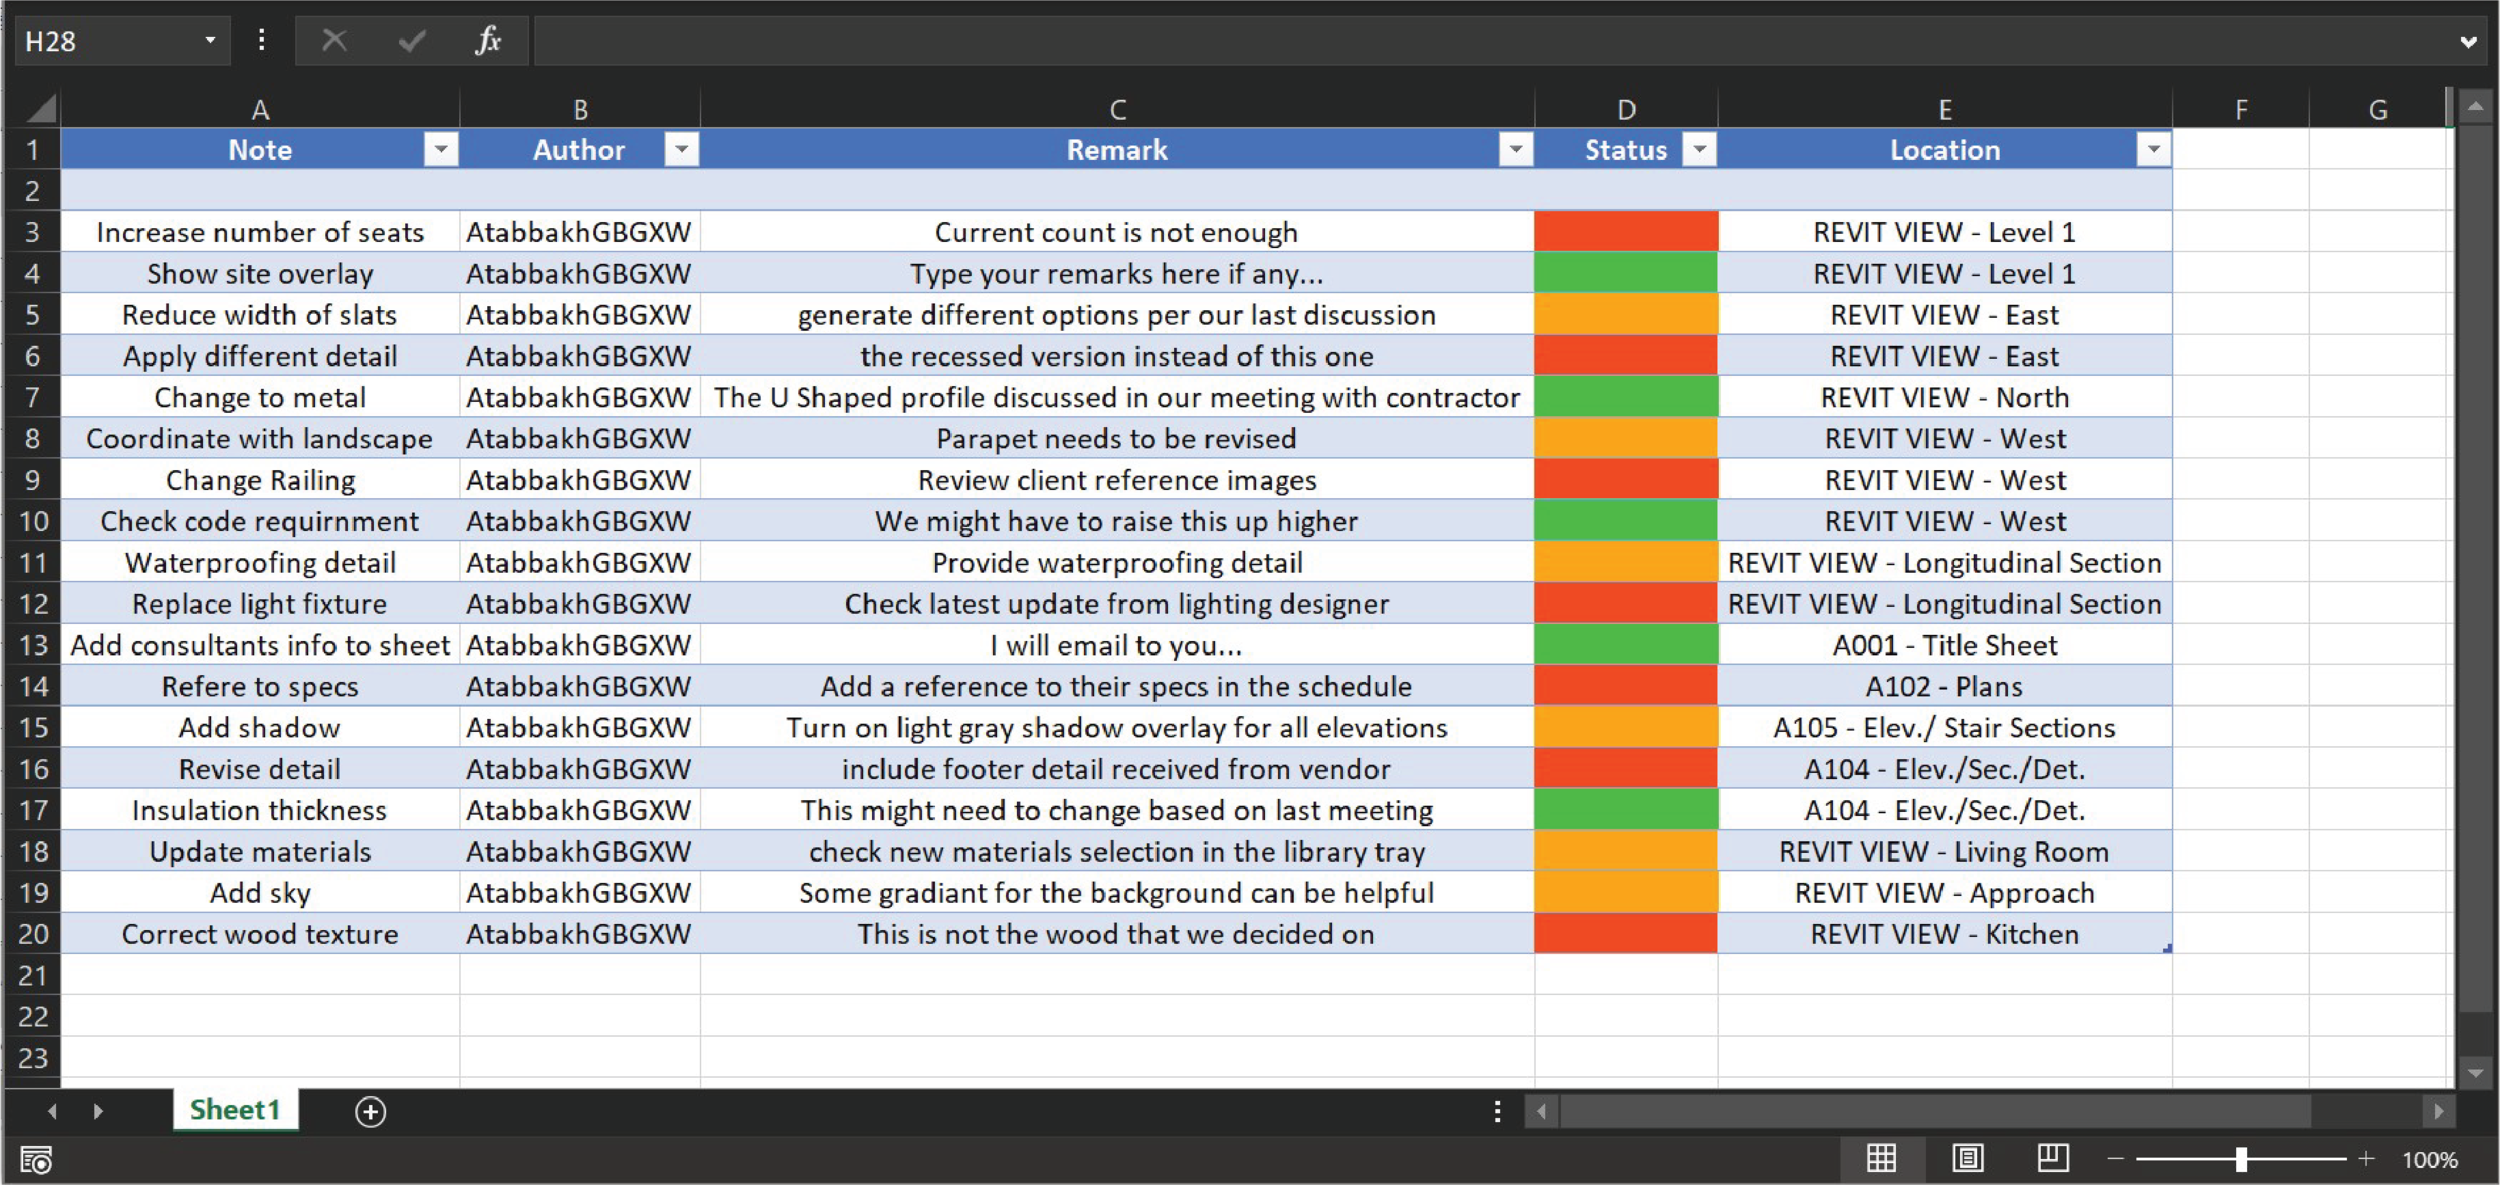
View in Excel and PDF
Once exported, new Excel and PDF files will be created at the saving location selected in the previous step.

Edit and Share with your Team
The Excel sheet will contain all the information displayed in the schedule window in Revit. All headers are formatted to be sortable based on user selected criteria, and all cells are set to wrap text.